If you are locked out of WordPress and the recovery email will not reach you, you can still reset your password by hand, either by editing the user record in the database through phpMyAdmin, or by dropping a one-line snippet into your theme files through your host’s file manager. Both work without touching the login screen at all.
Below I walk through both methods, explain the one step most guides get wrong (the password encryption), and show you how to lock everything back down once you are in.
Key Takeaways
- Use this only when both your recovery email and your dashboard are unreachable; the normal “Lost your password?” link is always the safer first try.
- The phpMyAdmin method edits the
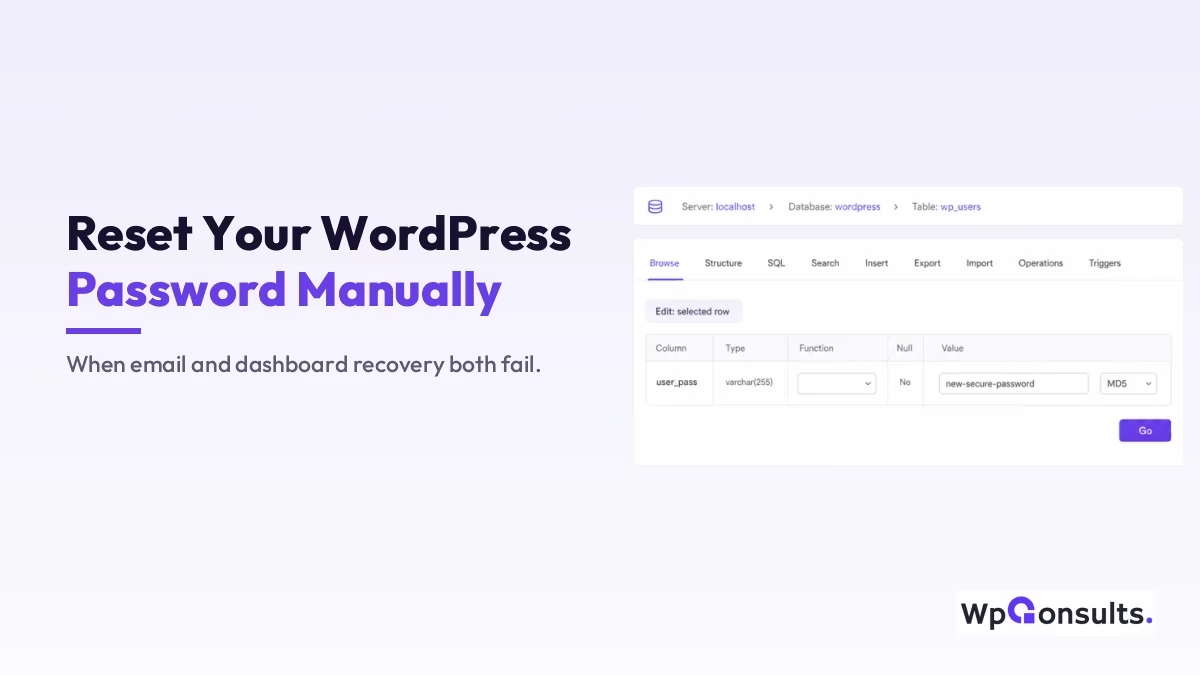
user_passvalue directly in thewp_userstable. - You must set the function to MD5 before saving, or WordPress cannot read the new password.
- The true file-manager method uses a short
wp_set_password()snippet infunctions.php, which you remove straight after. - Always export the database first; one wrong row in
wp_userscan lock you out further. - Once you are back in, change the password again from the dashboard so it is stored with WordPress’s own strong hashing.
When you actually need this method
Most lockouts are solved by the Lost your password? link on the login page, so try that first. The manual route only earns its place when that link is useless to you: the reset email never arrives because your site cannot send mail, or it arrives but the link still bounces you out, or you have lost access to the inbox entirely.
If the real problem is that your site simply cannot send email, fixing that is the better long-term cure, and I cover it in setting up SMTP manually in WordPress. But when you need in now, going straight to the database or the files is the fastest way back.
Method 1: Reset the password in phpMyAdmin
This is the classic approach, and it works on almost any host because phpMyAdmin ships with nearly every cPanel or hPanel setup. You are going to open your database, find your user, and overwrite the stored password.
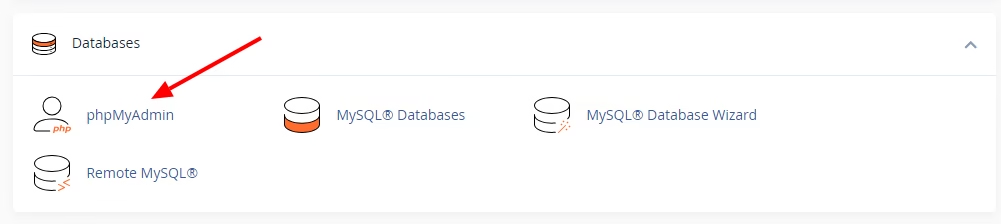
1. Open phpMyAdmin from your hosting panel. Log into cPanel, hPanel, or whatever control panel your host gives you, and look for the phpMyAdmin icon under the databases section.
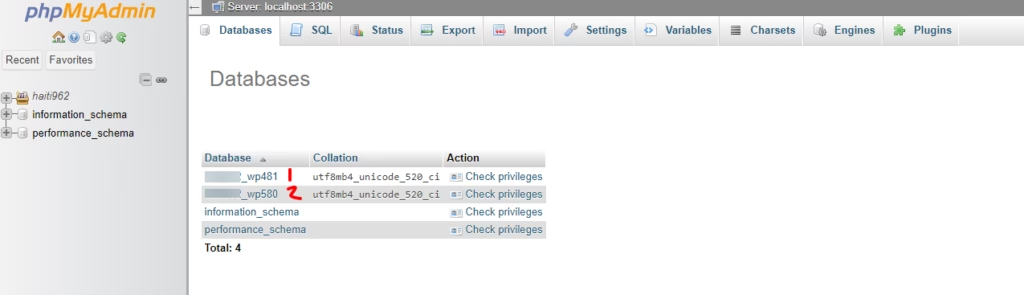
2. Select the correct database. If you run more than one site on the account, this is where people slip up. Pick the database that belongs to the site you are locked out of; editing the wrong one does nothing useful. Not sure which is which? I explain how to match a site to its database in how to find your WordPress database.
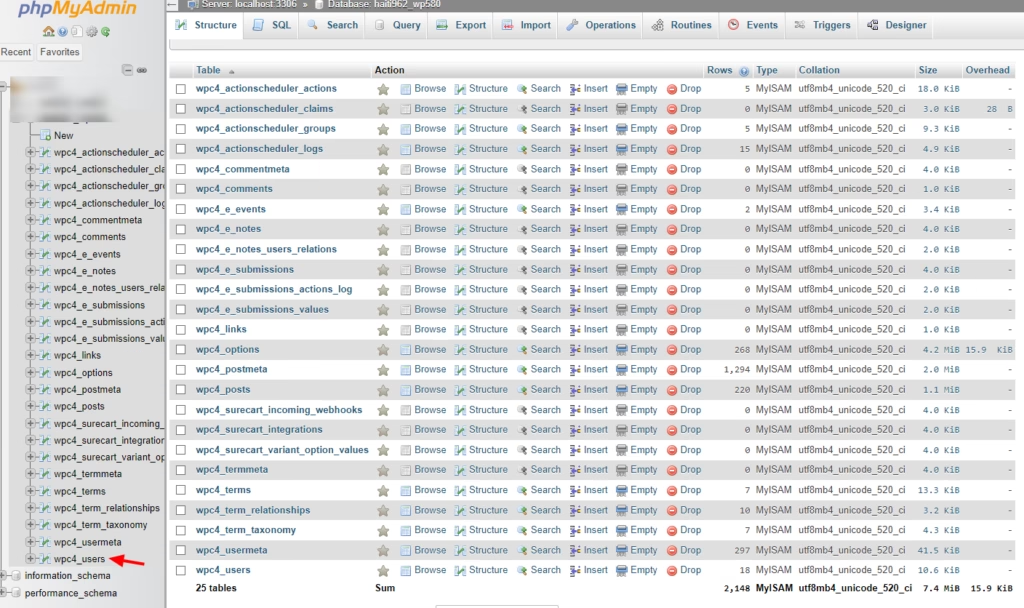
3. Back up the database, then open the wp_users table. Before you change anything, hit Export on the top bar and save a copy to your computer; that single click is your undo button if something goes wrong. Then find the wp_users table in the left sidebar and open it. (Your prefix may differ, for example wpxy_users, if it was changed at install.)
4. Pick the right user. Match it by user_login or user_email so you are sure you are editing your own admin account and not someone else’s, then click Edit on that row.
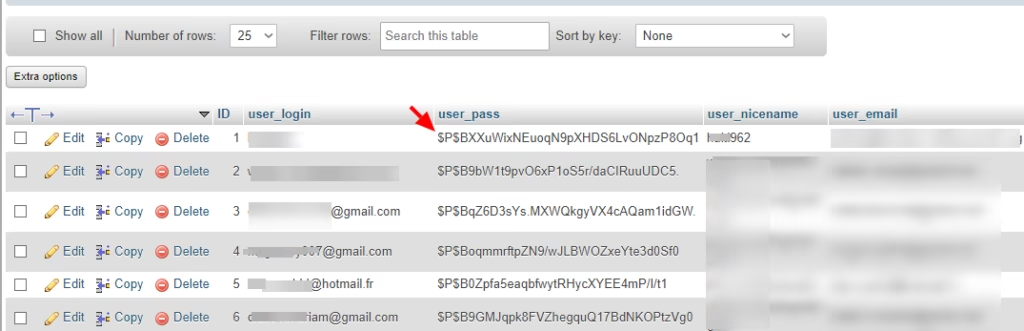
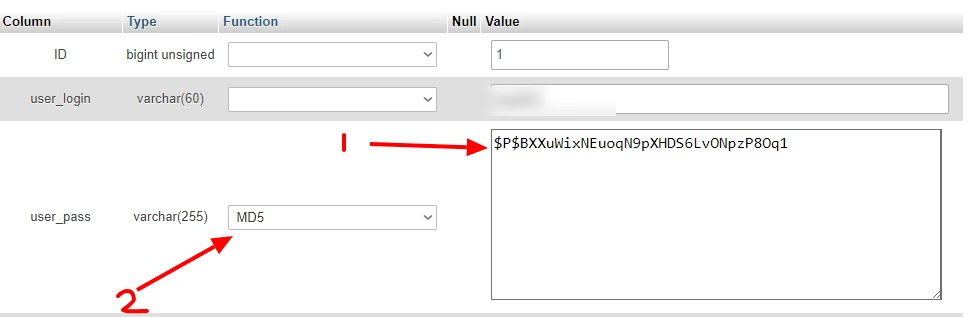
5. Type your new password into user_pass, and set the function to MD5. This is the step that trips people up. The user_pass field does not hold plain text; it holds a hash. So clear the existing value, type your new password in plain text, and in the Function dropdown beside that row choose MD5. If you skip the MD5 function and save raw text, the login will simply never match and you will think the method failed.
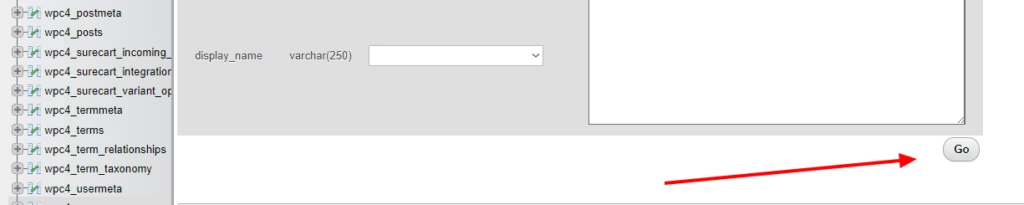
6. Click Go to save. That writes the MD5 hash into the database. Now go back to /wp-admin and log in with your username and the new password.
Here is the reassuring part that almost no guide mentions: WordPress no longer stores passwords as plain MD5, it uses a stronger portable hash. But it still accepts an MD5 hash on login for exactly this reason, and the moment you log in successfully, WordPress quietly re-hashes your password into its modern format. So MD5 is just a temporary key to get you in; your stored password is upgraded automatically on the first login. The behavior is documented in the WordPress reference for wp_check_password().
Method 2: Reset it from the file manager with a snippet
If your host has no phpMyAdmin, or databases make you nervous, you can reset the password purely through the file manager instead. This is the method the title really refers to, and honestly it is cleaner, because you let WordPress do the hashing for you rather than fiddling with MD5 by hand.
Open your host’s file manager, go to /wp-content/themes/your-active-theme/, and edit functions.php. Add this single line right after the opening <?php tag:
wp_set_password( 'YourNewStrongPassword', 1 );The 1 is the user ID, which is almost always 1 for the first admin account; if yours is different, use that number. Save the file, then load any page of your site once in the browser so the line runs. WordPress hashes the password properly and updates the database for you.
Now the part you must not skip: delete that line immediately. If you leave it in, your password will reset on every single page load, and worse, your password sits in plain text inside a theme file that backups and other users could read. Remove the line, save again, then log in. The official wp_set_password() reference confirms this is the function WordPress itself uses to set a hashed password.
A faster option if you have command-line access
If your host gives you SSH and WP-CLI is installed, you can skip the files and the database entirely with one command:
wp user update 1 --user_pass="YourNewStrongPassword"It hashes the password correctly and writes it in one step, no MD5 dropdown, no snippet to remember to delete. The syntax lives in the WP-CLI user update handbook. I only list it as a nod, since most people who are locked out and panicking do not have SSH set up, but if you do, it is the tidiest of the three.
Lock things down once you are back in
Getting back in is only half the job. Whichever method you used, go to Users > Profile and set a fresh strong password from inside the dashboard, so it is stored with WordPress’s normal hashing and there is no leftover trace anywhere. If you edited functions.php, double-check the snippet is really gone.
Then deal with the reason you were locked out in the first place. If the reset email never arrived, your site cannot send mail reliably, and the fix is proper email delivery, which is exactly what configuring SMTP in WordPress solves. Sorting that out means you will never need this manual dance again.
So which method should you use?
If this were my site and I had no command line, I would reach for the file-manager snippet over phpMyAdmin every time. It lets WordPress handle the hashing, so there is no MD5 step to forget and no risk of mangling a database row. The phpMyAdmin route is perfectly fine and sometimes it is all your host offers, but it asks you to get one fiddly detail exactly right, and that detail is where most failed attempts come from.
WP-CLI is the cleanest of all if you have access, but that is the smaller group. So my honest ranking is: snippet first for most people, phpMyAdmin when that is what you have, WP-CLI if you live in the terminal. Whatever you pick, back up before you touch anything and reset once more from the dashboard afterwards.
Update Logs
27 Jun 2026
- Expanded the guide to cover the file-manager snippet method and a WP-CLI option alongside phpMyAdmin, explained why the MD5 function matters, and added that WordPress re-hashes the password to its stronger format on first login.
Want our posts to show up more often on Google?
One step & Google will surface this site in your Top Stories.